

How To Create Ombre Lips
Ombre means having two different colors that are monochromatic. Ombre style has been popular in hair coloring, nail art and yes lips too!
Ombre lips can look awesome, but if not done correctly they can make you look very tacky! The secret to doing ombre lips is to first try it out with your regular lip colors. Play around with different hues that merge well together and once you are satisfied with the results only then step out into the open
For Ombre Lips
Following are the important steps included in Ombre lip makeup tutorial.
1. Color Selection
The first step is to understand which two colors can look good together to create the effect.
To decide the colors, pick one color that is your main lip color. Then choose a color that is either lighter than your base color or darker than your base color. But make sure it is similar in hue. The best look for ombre lips is achieved if you use a red lipstick and pair it up with the darkest brown you have. But for starters you should opt for a pink or a dark brown with your red. If you are opting for a pink as your base then use an orange lipstick or a brown one for the ombre effect. The secret is to use two colors that can be used to create a gradient of color on your lips.
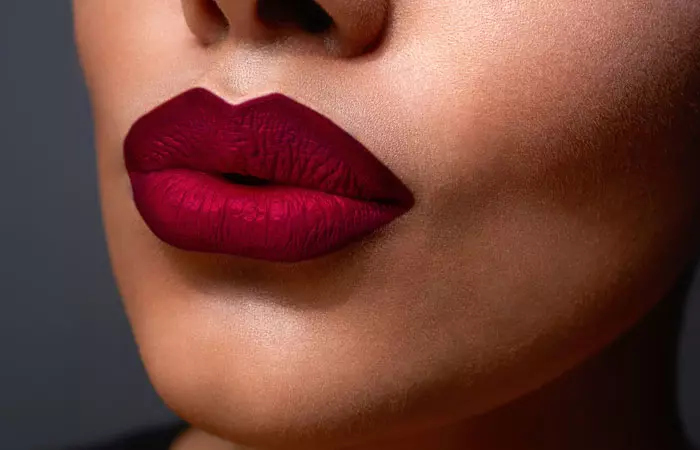
Image: Shutterstock
2. Technique
The next step is choosing your technique. There are various ways in which you can create the color gradient of a DIY ombre lips. Having one lip in a darker shade than the other, using the gradient from outer most edge to the inner most part of the lips, or even going horizontally across such that one corner of your mouth is lighter in color than the other corner.
3. Two Tone Effect
The simplest form of ombre lips is to use the lighter shade on one lip and the darker shade on the other lip and then blending them in at inner side of the lips.
4. Outer Devil
The next technique of using the colors is to line your lips with a lipliner that is one shade darker than you're base lipstick color. Keep the line thicker on the corners and taper off as you move to the curve of the lips. Then apply the base lipstick to the lips leaving out the inner most part of the lips. In the inner most part, use the lighter lipstick and top off with clear gloss to even it all out.
5. Inner Devil
This technique is a simple reversal of the previous one. Reverse the use of colors such that inner most part of the lip is darker and the colors get lighter as you move out. This technique looks best if the difference in gradient is not stark. The best is with a pink inner most color and a neutral outermost color.
6. Oomph Effect
I call this technique the oomph effect because if you do this using a bright red and deep brown or black, it gives you absolutely sexy looking red ombre lips. The technique involves using a black/brown lipstick or liner. You need to trace a line of black/brown on the inner corners of your mouth and line the lower lip with this as well. Now trace over this line of black or brown with a deep colored lipstick (preferably a wine shade). Finally, apply a red lipstick all over your lips (you can skip the wine colored lipstick if you are using a deep shade of red)
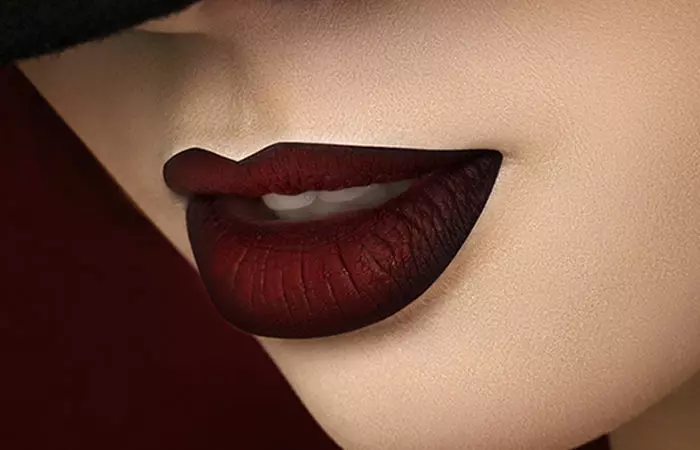
Image: Shutterstock
7. Other Gradients
Many other variants of the basic techniques exist. You can even play with more than two colors once you are comfortable with the basic concept. Here are some more pictures of beautifully done gradients to create the perfect ombre lips.
Are you getting more impressed with these Ombre Lips? Then, try the following ombre lip tutorial step by step and get set go with the latest ombre lip makeup look.
Things You Will Need
You do not need anything fancy to get this look right. If you are into fashion, I am sure you will find most of these things in your makeup kit!
- Tissue paper
- Red lipliner
- Red lipstick
- Orange lipstick
- Concealer
- Lip brush
- Shimmery pale highlighter eyeshadow
- Lip balm
- Clear Lip gloss
Ombre Lip Makeup Tutorial
Let's begin the ombre lips tutorial:
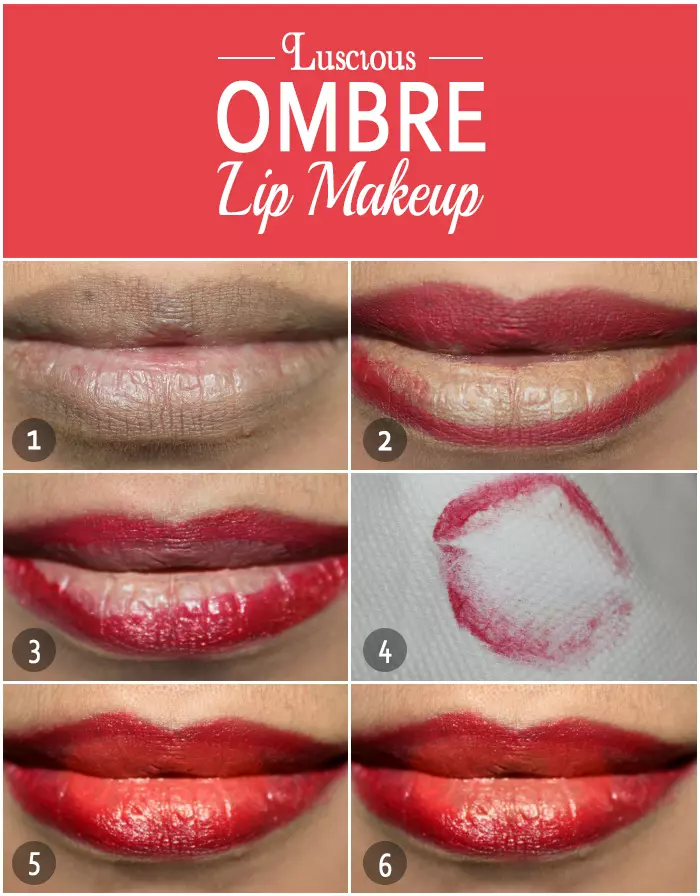
Step 1
Start by moisturizing your lip area with a good hydrating lip balm. If you have rough and flaky lips, I recommend applying a lip scrub prior to the use of a lip balm to smoothen and soften the lips. Then, apply a light concealer all over your lips to hide the darkness or any lip pigmentation that you may have. If you have fairly pink lips without any pigmentation then you can skip this step.
Step 2
Then, take a vibrant and bright red lip pencil, preferably in a matte formula to define your lips. Start by creating shorter stokes from the top most lip area and complete lining your lips. Then, use the same lip pencil and fill the upper lip area completely.
Step 3
Take a red lipstick and top it over the areas where the liner was applied earlier. Use a thin lip brush to blend the lipliner and the lipstick evenly for a neat finish. Here, I used the Inglot lipstick refill in the shade number 80. Then, use the same concealer, which was used in the first step and start filling only the center lip area to brighten it.
Step 4
Then use a tissue paper and blot your lips softly. This step will remove the harsh edges and excess lipstick from the lips.
Step 5
Then apply a very bright orange lipstick over the center of your lips. This lipstick should be applied directly over the concealer, applied in the previous step. Then, apply a transparent lip gloss to the center of your lips to add volume and plump effect. Use a thin lip brush and blend the orange with the red lipstick slowly to remove any harsh edges.
Step 6
Then, apply a soft champagne or highlighter eyeshadow to the lower centre of the lip. This step is optional and if you are not comfortable in adding more glossiness to the lips, then you can skip it. Applying a shimmery formula to the lips will give a soft highlighted look to the lips. Here, I used the Inglot lipstick eyeshadow refill in the shade 11.
And you are done! You can easily tweak the color of the lipsticks used in this makeup tutorial. If you use stronger contrasting lipstick colors, such as pink and purple, the ombre effect provided will be more intense and vibrant. Since, I wanted a wearable ombre look, I decided to go with slightly less contrasting lip colors.
How do you like this trend? Was this article helpful? Do share your feedback with us in the comments section below.
Recommended Articles:
- NARS Velvet Matte Lip Pencil Shades
- essence Lip Liner Review
- MAC Retro Matte Lipstick Ingredients
Was this article helpful?
The following two tabs change content below.
- Author

Jyotsana Rao is an engineering graduate from NIT, Nagpur, who discovered her love for writing during her undergraduate days. She... more
How To Create Ombre Lips
Source: https://www.stylecraze.com/articles/ombre-lips/
Posted by: cochranhaustrand.blogspot.com
0 Response to "How To Create Ombre Lips"
Post a Comment