

How To Create A Scatter Plot In Excel 2010
Joshua is a graduate student at the USF. He has interests in business technology, analytics, finance, and lean six sigma.
A scatter plot can tell you whether the data of two variables are directly related, indirectly related, or not related at all.
Created by Joshua Crowder
A scatter plot may very well be the most useful creation in the history of statistical graphics. The creation of the scatter plot by Galton led to the use of correlation and regression in the field of statistics.
Scatter plots can tell you a lot about data. A scatter plot is taking two variables and plotting data points on a graph. Creating a scatter plot in Excel is a great way to find out whether two variables have a relationship and can also measure how close that relationship is.
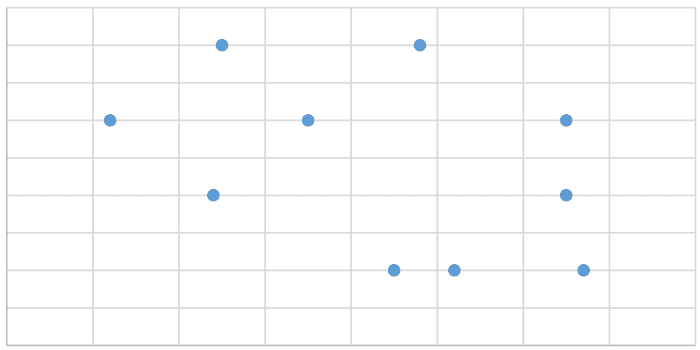
Below is a data set from an unknown source. Even without discussing background information about the data, it is still possible to figure out how closely related the two variables are within a scatter plot.
Let's run through an example in Excel to highlight the steps used to create a scatter plot.
To find a relationship between two variables let each variable represent either an x or y value. When their points are plotted the relationship is visible by how the points are dispersed throughout the graph.
Created by Joshua Crowder
Inserting a Scatter Plot
To insert a scatter plot, several steps need to be made. First, select the data that you wish to plot. Next, choose the Insert tab and click on the insert scatter or bubble chart option noted by 3 in the illustration below. Finally, select the scatter chart option.
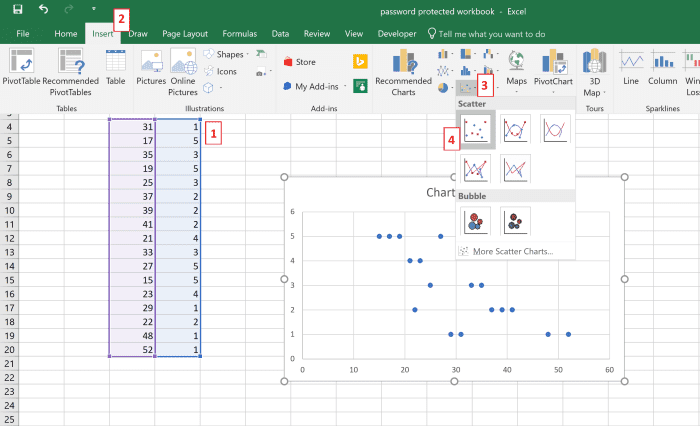
Inserting the scatter plot takes three easy steps: Selecting the data, selecting the insert scatter, then selecting the scatter option.
Created by Joshua Crowder
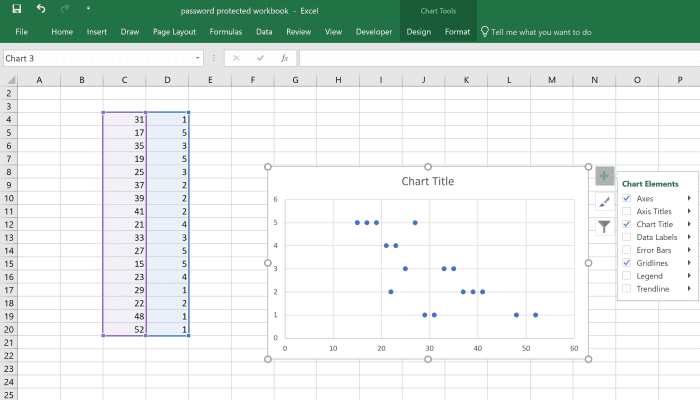
Displaying Chart Elements of a Scatter Plot
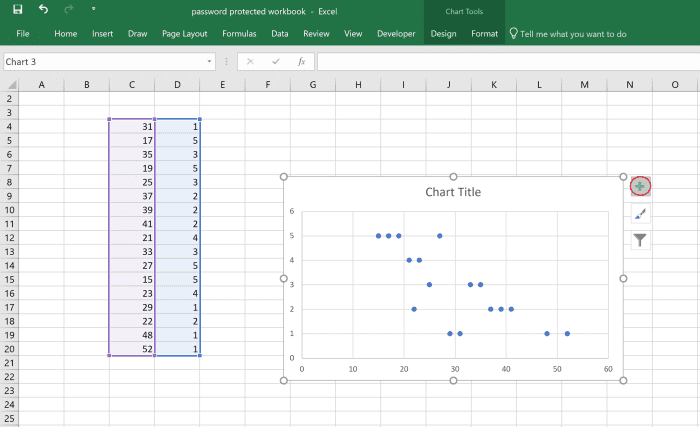
Notice the green cross to the right of the scatter chart that appears after the chart is selected. Click on this button to show chart elements options. The list of elements that appear allows you to change the appearance of your graph by adding them to the chart or removing them.
Dispalying Chart Elements Options
Created by Joshua Crowder
The elements that can be added or removed from a scatter plot are:
- Axes
- Axis Titles
- Chart Title
- Data Labels
- Error Bars
- Gridlines
- Legend
- Trendline
Any of the above chart element options can be displayed by clicking on the check box next to that option. Each chart element is further explained below.
By default, axes, chart titles, and gridlines are automatically placed on a chart when a chart is first created. It is up to the Excel use to add elements if needed.
Created by Joshua Crowder
Show Axes
The axes are shown on the graph by default. You have the option to remove this option if you wish. When the axes are removed, essentially, you are removing the measurements for the X and Y axes.
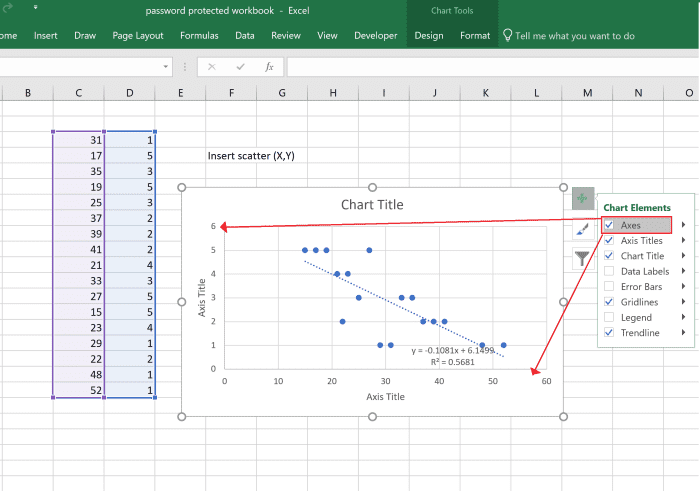
It's best for any graph with multiple variables to have the axes displayed so the axes can help tell a story about that information.
Created by Joshua Crowder
Show Axis Titles
When axis titles are displayed, the labels can be edited for each axis by double-clicking on these text boxes.
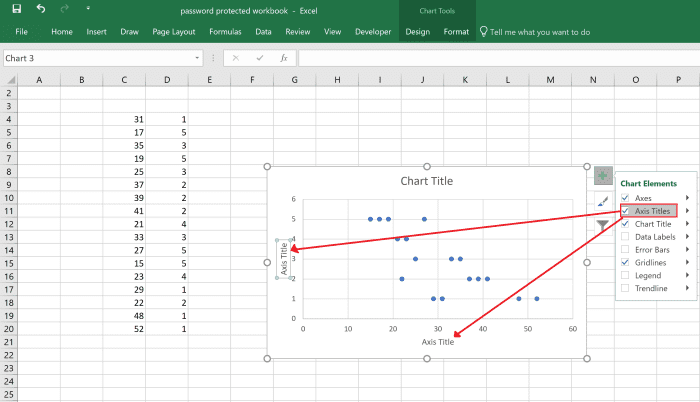
Axes Titles Displayed
Created by Joshua Crowder
Chart Title
The chart title is set to display by default. This can be removed by unchecking the check box beside "Chart title" or by right-clicking on the chart title and then clicking delete. To edit the title, double-click its text box.
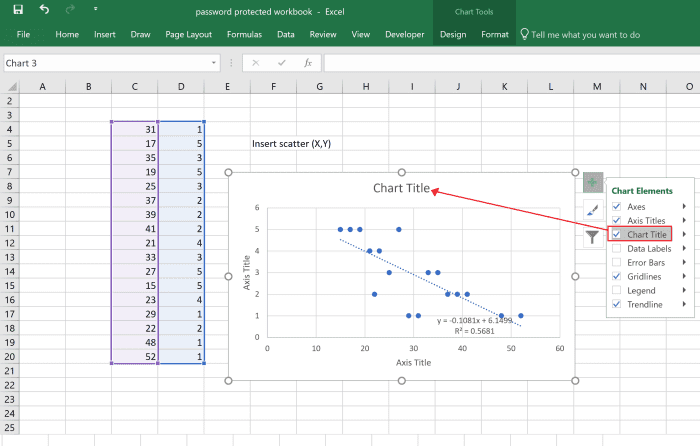
Chart Title Displayed
Created by Joshua Crowder
Showing Data Labels
A data labels option is available to show data for each data point. By default, the y-axis position data points are displayed when this option is selected.
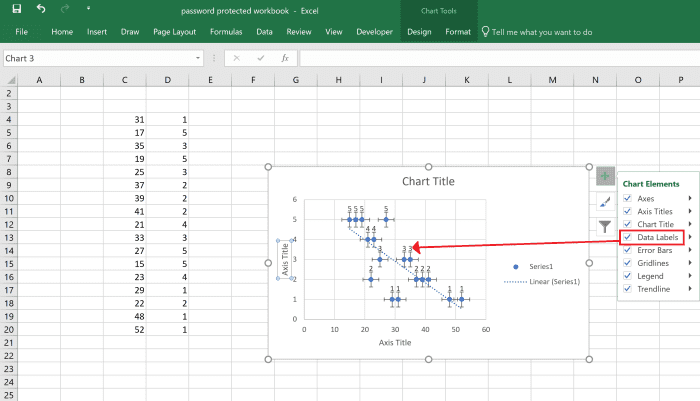
Data Labels Displayed
Created by Joshua Crowder
Showing Error Bars
Error bars can also be displayed by checking the box next to that option to indicate the uncertainty of data points on the chart.
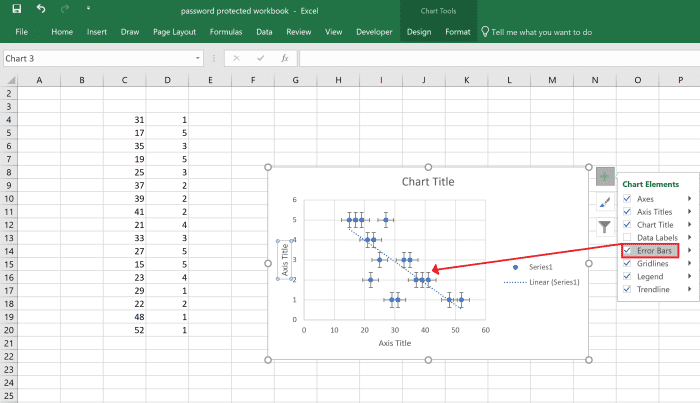
Error Bars Displayed
Created by Joshua Crowder
Gridlines
This option allows you to either add or remove the line in the background of the chart.
Displaying the Legend
Adding the legend allows you to identify the plot point and trendline designs in the chart.
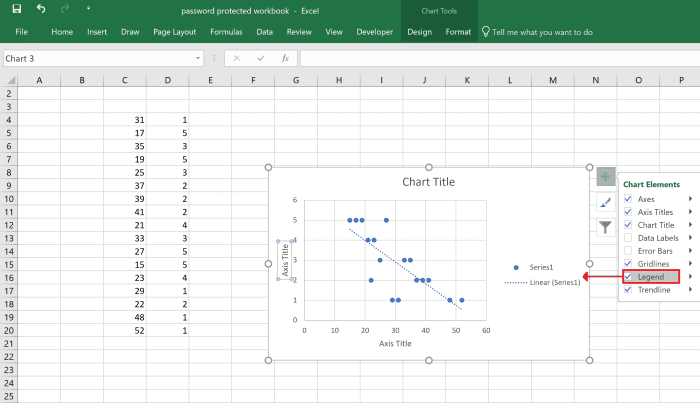
Legend Displayed
Created by Joshua Crowder
Show Trendline
The trendline option will display a trendline based on a regression of all the data In the scatter plot. Sometimes when viewing a scatter plot, the relation between the variables is not apparent. A trendline can tell you three things:
- Whether the data is inversely related when the trendline slants down from left to right.
- whether the data has a direct relationship when the trendline slants up from right to left.
- Whether the data has no relationship when the trendline is a flat line.
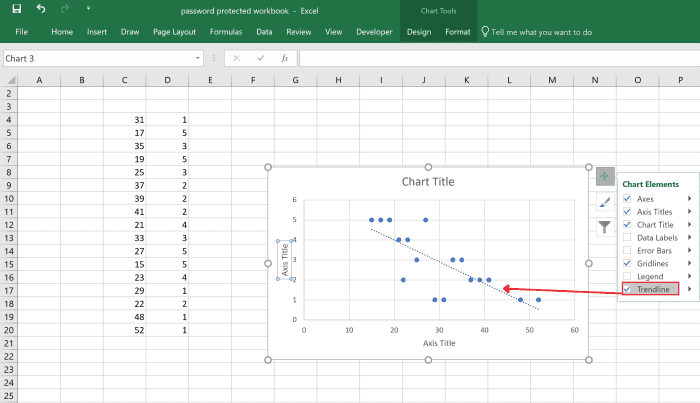
Trendline Displayed
Created by Joshua Crowder
Formatting the Trendline
The trendline offers additional options. A few options that can benefit an analysis of your data are the options to display the regression equation for the data and R-squared value on the chart. To complete this task, click on the chart, then click on the arrow to the right of the trendline option.
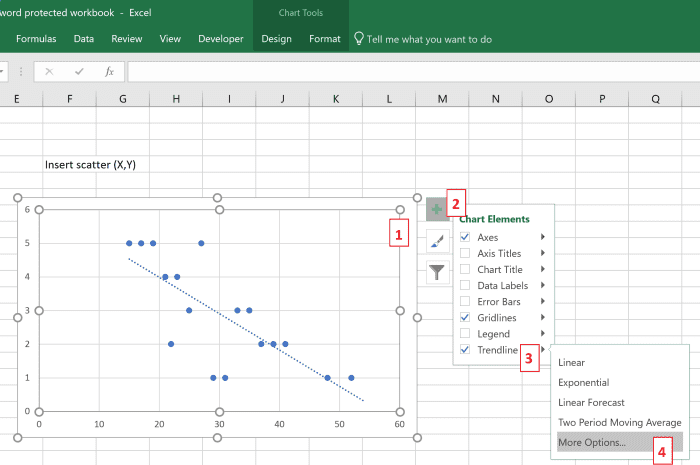
Trendline Options
Created by Joshua Crowder
Adding the Slope Equation & R-Squared
To add the regression equation and R-square value click on the check boxes shown in the illustration below.
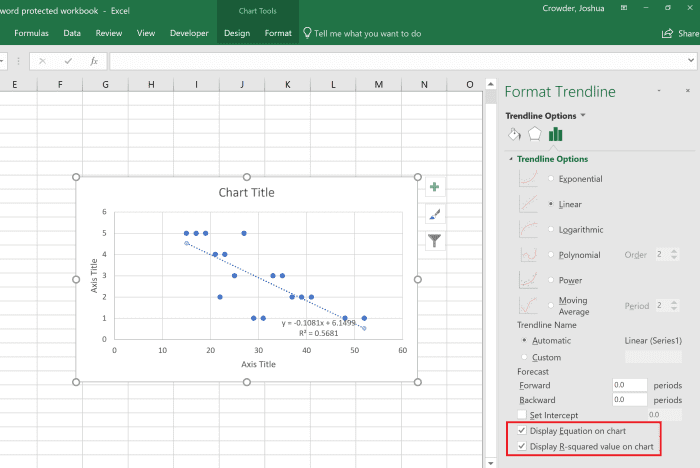
Equation & R-Square Displayed
Created by Joshua Crowder
To learn more about building graphs in Excel I recommend the following book. I have been using the Excel Bible for years to improve my understanding of all aspects of this Microsoft product.
This content is accurate and true to the best of the author's knowledge and is not meant to substitute for formal and individualized advice from a qualified professional.
© 2019 Joshua Crowder
How To Create A Scatter Plot In Excel 2010
Source: https://turbofuture.com/computers/How-to-Create-a-Scatter-Plot-in-Excel
Posted by: cochranhaustrand.blogspot.com
0 Response to "How To Create A Scatter Plot In Excel 2010"
Post a Comment