

How To Create Slope In Shower Floor
Updated date:
How to Lay Tile Over an Existing Shower Floor
Bert spent 25 years working as a home-improvement and residential construction contractor in central Florida.
Can You Tile Over Tile in a Shower Floor?
As a tile shower floor ages, its imperfections quickly turn into an eyesore.
- Each settlement crack in the grout creates a pathway for water to seep into the concrete subfloor. A low spot lets water puddle. Both of these issues promote mold and mildew growth in the grout and subfloor, which darkens the grout in the problem area.
- Many shower floors have cut tile with sharp or rough-looking edges. The bad cuts can turn an otherwise good-looking tile floor into an amateurish-looking maintenance nightmare.
Laying a new layer of tile over the existing shower floor can solve these issues without removing the old tile and grout. Below, you'll find instructions for prepping the old floor tile, installing new tile over it, and finishing the job.
Preparing the Existing Shower Floor
Most good tile setters will tell you that a high-quality tile project always starts with subsurface preparation. A tile shower floor uses a mortar and sand mixture as a subfloor. The tile setter dry packs the mortar mixture in the shower pan. He then cuts in the floor's slope with a straightedge. Once dry, the mortar gives the tile a solid surface to rest on. An improperly created subsurface causes high and low spots in the finished floor. Sometimes it takes as long to prepare the subsurface as it does to lay the tile.
How to Prep the Floor
- Remove the shower drain cover and set it aside.
- Stuff a rag into the top of the drain hole. The rag prevents debris from falling down into the drain pipe.
- Hold one end of a bubble level on the drain opening and slide the other end of the level across the existing tile's surface to check the floor's slope. When measured from the drain opening to the furthest wall, the level should show about 1/4-inch of slope per foot. Slide the level across the floor and mark all high and low areas with a wax pencil or permanent marker.
- Put on all safety equipment, including safety glasses and leather work gloves.
- Remove any raised tile using a hammer and chisel. Do not worry about damaging the neighboring floor tile. A single raised tile can hold enough water to create a puddle.
- Remove all of the old caulking material from the perimeter of the shower floor, including the caulking covering the bottom six inches of each of the wall's corners.
- Thoroughly clean the entire shower stall, using any household cleaner that removes soap scum and hard-water deposits.
Fixing the Slope
- Mix a white-colored thinset in a bucket, using the thinset manufacturer's instructions. White-colored thinset will not bleed through the new shower tile's grout.
- Dampen the floor with water.
- Fill any dips or missing tile in the existing tile floor with the thinset, using a flat trowel to feather the thinset into the surrounding tile.
- If the existing shower floor does not have the proper slope, build up the low area with thinset.
- Run a straightedge across the floor's surface and shave off any high areas of thinset.
- Let the thinset dry before continuing.
- Double-check the floor for slope and dips with the level. Continue to add thinset to the problem areas, as needed. If the added thinset created a high spot, rub the high spot with a sanding stone or cinder block.
- Clean up all of the debris.
Preparing the Drain
- Mount a shower drain extension ring, a 1/4-inch-thick plastic ring, on top of the existing shower drain. The extension ring's mounting screws secure the ring against the top of the existing shower drain opening. Use a ring of the same diameter as the existing shower floor drain opening. Most extension rings bolt directly to a four-inch diameter round drain opening.
- After the new tile floor dries, the ring will hold the drain cover flush with the new shower floor tile's finished surface.
- An adapter can convert a round drain cover into a square cover. The square cover makes cutting the tile around the opening easier. If using a square cover, mount the adapter to the extension ring now.
Installing the Shower Floor Tile
- Make a bucket of white-colored thinset, using the manufacturer's wet-mix ratio, if applicable. Most shower floors require about one gallon of thinset.
- Spread the thinset on the shower floor with a notched trowel, starting at the far corner and working toward the shower curb. Only cover as much of the floor as you can reach with a sheet of tile. When working on a larger shower floor, consider laying about half of the tile at a time, completing the far half first. If the thinset rolls with the trowel, add a little more water to the mixture.
- Position the first full sheet of shower floor tile against the most visible corner. If you are working in a larger shower, start at a far corner and work back toward the door. Shower floor sheet tile have several rows of small tile that are held together with a mesh backing. The small pieces lets the tile follow the slope of the floor. The backing keeps the grout joints between each small piece even. Lay each full sheet of uncut tile on the shower floor.
- Do not install the tile surrounding the drain opening or any cut pieces of tile near the shower walls yet. Adjust each full sheet of tile until the grout joints between the sheets match the joints between the individual pieces of tile. Lightly tamp the tile into the wet thinset with a grout float.
- Measure the space between the full sheets of tile and the adjacent wall. Transfer the measurement to a sheet of tile. Layout the cuts surrounding the drain opening, using the drain cover as a template. Make the cuts with an electric tile cutter or a set of tile nippers. Set the cut tile in their respective spots on the shower floor. Lightly press the shower floor tile into the wet thinset with a clean grout float. Wipe any excess thinset from the grout joints with a wet sponge.
- Check the floor for high and low spots with the bubble level. Tamp high spots down with the grout float. Add more thinset to any low tile. Wash the floor with a damp sponge. Wait about one hour before continuing.
- Inspect each grout joint for thinset. Often while tamping the floor, excess thinset will fill the grout joints. This thinset will bleed through the grout covering it. Once the floor has dried, any excess white thinset will stand out against the grout; white grout makes white thinset look grey. Carefully run a handheld grout saw across any thinset. The saw's carbide blade will cut a groove in the thinset. Vacuum any debris from the grout joints.
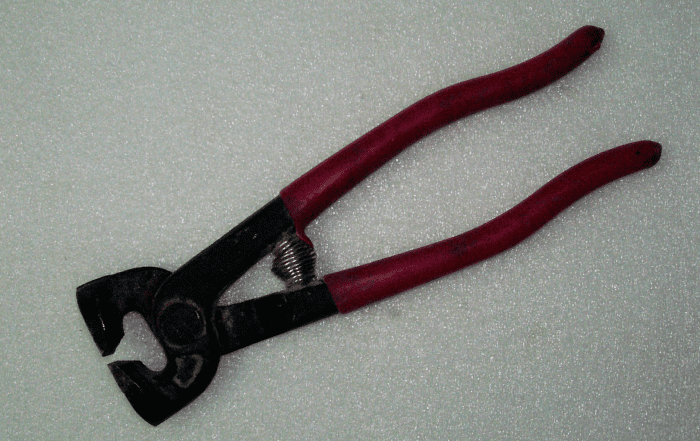
Use the nipper's blades to shape the tile so it fits tightly against the floor drain.
Finish the New Shower Floor
- Mix sanded tile grout, using the grout manufacturer's directions, in a bucket with water. Always follow the manufacturer's powder grout to water ratio.
- Continue to stir the grout until all of the dry powder has mixed and the wet grout has a uniform color.
- Dump the grout on the tile floor and press the grout into the joints with a rubber grout float. The grout must completely fill the cavity between each set of tiles.
- Cut in the corners with the edge of a margin trowel. The margin trowel will give the corners a 90-degree cut.
- Clean the floor with a damp sponge, using circular wiping motions. Wait 24 hours before continuing.
- After the grout has dried, polish the tile's surface with a clean dry rag. Clean any leftover grout on the tile that the rag will not remove with white vinegar and a stiff-bristled nylon brush.
- Let the floor dry completely.
- Run a bead of tile caulking around the perimeter of the shower floor, covering the floor-to-wall grout joint.
- Let the caulking dry completely before using the shower.
Read More From Dengarden
This article is accurate and true to the best of the author's knowledge. Content is for informational or entertainment purposes only and does not substitute for personal counsel or professional advice in business, financial, legal, or technical matters.
Questions & Answers
Question: My shower tile floor doesn't have any cracks. However, I hate the style and color, and I want to install a pebble floor. Two tile setters have told me that it can be installed on top of the existing floor, but people at the tile store said it is was not a good idea. Now I am not sure what to do. What is your professional opinion?
Answer: As long as the existing floor is solid with no major settlement issues or loose tiles, then the tile setters are correct. It is possible the tile salesman wants you to rip up the old floor and subfloor so that he can sell you more than just the thinset and pebble-tile you need to give the shower a facelift.
Question: Would it be possible to tile over existing shower wall and ceiling tile? I have heard some mixed advice, and have seen very few related articles on the subject.
Answer: I wouldn't want all the extra weight on the ceiling. I would not trust the drywall above to hold two layers of tile, grout, and thinset. The wall tile is often possible. However, other issues need to be kept in mind, such as, the extra tile thickness means the shower valve often requires longer escutcheon screws, glass enclosure's size needs to be adjusted, and so on.
Question: I have been told by several tilers that you cannot put tile over tile because it will crack. Are you sure you can do this successfully?
Answer: The new tile will not crack when properly attached to a non-flexing solid subfloor. If your existing shower floor flexes, the new tile will crack in the same areas. Look for large grout or tile cracks that run across the entire floor. These cracks are evidence of a subfloor problem that needs to be addressed first.
Question: Is it possible to take the tile off of the shower curb and the walls to re-tile, but leave the existing shower floor tile in place and follow the steps outlined here?
Answer: Yes, this is a common project.
Question: My tiles are crack due to foundation settlement. Can I put new tiles over the cracked tiles?
Answer: The new tile will crack again if the foundation continues to settle. If you redo the shower floor, remove everything down to the subfloor. Make sure the subfloor is solid and then install a pan membrane, slope the floor, and install the tile. The membrane not only catches water seepage, but it creates a barrier that prevents minor subfloor settlement cracks from transferring to the tile.
© 2012 Bert Holopaw
Related Articles
How To Create Slope In Shower Floor
Source: https://dengarden.com/remodeling/How-to-Lay-Tile-Over-an-Existing-Shower-Floor
Posted by: cochranhaustrand.blogspot.com
0 Response to "How To Create Slope In Shower Floor"
Post a Comment